How to Install Python on Windows 7
How to Install Python on Windows

If you are looking for a simple application to learn programming or if you are an experienced software author, you can benefit from using the highly versatile and functional programming tool called Python.
About Python
Python was originally conceived and developed by a Dutchman named Guido van Rossum in the early 90’s. Though he is widely credited with the creation of Python, he had a lot of help from other contributors. Over the years, Guido and his team continued to improve the software until May of 2000 when they officially made the transition to BeOpen.com and made the software much more readily available to the world. It was no more than a year later, in 2001, when the PSF (Python Software Foundation) was created.This non-profit organization was developed with a simple dream and sponsored by the Zope Corporation (then Digital Creations). That dream was and remains to this day, to:
“promote, protect, and advance the
Python programming language, and to support and facilitate the growth of
a diverse and international community of Python programmers.”
Python is a great alternative for programmers because it is an open
source program developed under an OSI license. There is absolutely no
charge to download, install, or run the program on any computer. The
software is available in many different builds and supports 21 different
operating systems and operating environment which gives it its
universal appeal and cross system functionality.Downloading Python
If you don’t already have a copy of Python installed on your computer, you will need to open up your Internet browser and go to the Python download page.
Now that you are on the download page, select which of the software builds you would like to download. For the purposes of this article we will use the most up to date version available (Python 3.4.1).

Once you have clicked on that, you will be taken to a page with a description of all the new updates and features of 3.4.1, however, you can always read that while the download is in process. Scroll to the bottom of the page till you find the “Download” section and click on the link that says “download page.”

Now you will scroll all the way to the bottom of the page and find the “Windows x86 MSI installer.” If you want to download the 86-64 bit MSI, feel free to do so. We believe that even if you have a 64-bit operating system installed on your computer, the 86-bit MSI is preferable. We say this because it will still run well and sometimes, with the 64-bit architectures, some of the compiled binaries and Python libraries don’t work well.

Installing Python
Once you have downloaded the Python MSI, simply navigate to the download location on your computer, double clicking the file and pressing Run when the dialog box pops up.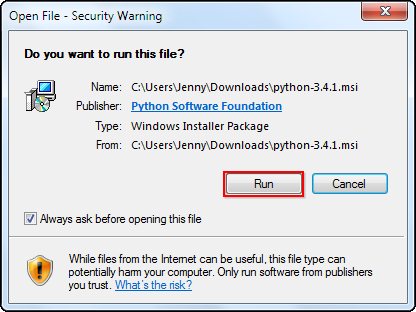
If you are the only person who uses your computer, simply leave the “Install for all users” option selected. If you have multiple accounts on your PC and don’t want to install it across all accounts, select the “Install just for me” option then press “Next.”

If you want to change the install location, feel free to do so; however, it is best to leave it as is and simply select next.

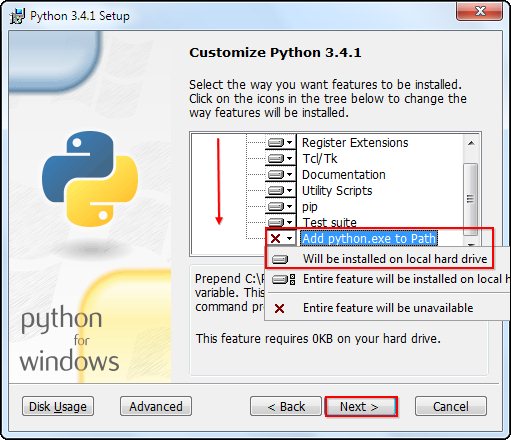
Scroll down in the window and find the “Add Python.exe to Path” and click on the small red “x.” Choose the “Will be installed on local hard drive” option then press “Next.”
You will notice that the installation will bring up a command prompt window while Python downloads and installs “Pip.” Pip is just a package management tool. This will allow you to install all the additional Python packages that are available for download through PyPI (Python Package Index).

Now that you have completed the installation process, click on “Finish.”

Adding Python to System Path Variable
If you decided to use the Python 3.4.1, you will not need to follow this process. You can simply skip ahead to the next section. The reason is that the new update integrates this process in the installation phase and so you no longer need to manually add the System Path Variable. If you want to add a second set of variables for Python, you can still follow the procedure but replace “27” with “34.”If you chose to use the 2.7.3 version of Python, you will need to follow these steps. Once you have successfully installed Python, it is time to add it to the System Path Variable. Doing this will allow Python to run scripts on your computer without any conflicts of problems.
Begin by opening the start menu and typing in “environment” and select the option called “Edit the system environment variables.”

When the “System Properties” window appears, click on “Environment Variables…”

Once you have the “Environment Variables” window open, direct your focus to the bottom half. You will notice that it controls all the “System Variables” rather than just this associated with your user. Click on “New…” to create a new variable for Python.

Simply enter a name for your Path and the code shown below. For the purposes of this example we have installed Python 2.7.3, so we will call the path: “Pythonpath.”
The string that you will need to enter is: “C:\Python27\;C:\Python27\Scripts;”

Press “OK,” then “OK,” then “OK,” then the red “X” to accept all changes and exit the “System Properties” window.
Simple Print Directive
Now that we have successfully completed the installation process and added our “Environment Variable,” you are ready to create your first basic Python script. Let’s begin by opening Python’s GUI by pressing “Start” and typing “Python” and selecting the “IDLE (Python GUI).”
Once the GUI is open, we will begin by using the simplest directive possible. This is the “print” directive which simply prints whatever you tell it to, into a new line. Start by typing a print directive like the one shown in the image below or copy and paste this text then press “Enter”: print (“Congratulations on executing your first print directive!”)

With Python 3, the interactive mode signaled by the presence of “>>>” means you can do things like simple math without any directives. Try doing a few simple problems as shown in the image below.
